Showing posts with label Cheese. Show all posts

Wednesday, July 22, 2015

Beat the heat with Cannoli Ice Cream

"Again with the variations on cannoli?" You say. Well, you might say, I suppose, but those of you who are like me and can't get enough of anything even vaguely related to these particular pastries will really enjoy this one, I'm sure.

Ever since acquiring an ice cream maker last winter, I have been experimenting with a variety of different ice cream flavors: strawberry-basil, peaches and cream, fresh mint chocolate chip, etc. Last weekend, though, I found myself with extra ricotta cheese and an idea: if Ben and Jerry's can do it, why can't I?

I scoured the internet in search of recipes, but none seemed to both fit my ice cream maker and appropriately approximate what I personally felt was the right taste for cannoli. I ended up blending a few together and came up with a lovely mixture.

It doesn't taste like cannoli filling, which is what I was going for, but it became something else entirely, something of its own. It tastes rather sweet, but not too sweet. There's a hint of spiciness that I think that comes from the addition of cinnamon and nutmeg. Why not try it for yourself?


Cannoli Ice Cream

[What you need]
2 cups whole milk
15 oz ricotta cheese
1/2 cup granulated sugar
1/2 cup powdered sugar
2 T vanilla
1 t cinnamon
1 t nutmeg
To taste: chocolate chips, chopped pistachios, and/or dried apricots*
pinch salt

[What to do]

  1. Whisk milk, salt, and granulated sugar together until slightly frothy.
  2. Add cheese, powdered sugar, vanilla, and spices
  3. Put in refrigerator for at least an hour, but it's best overnight
  4. Follow your ice cream maker's instructions or! use this method.
*My ice cream maker instructs you to add "mix-ins" chocolate, nuts, fruit, etc at the last 5 minutes of the process, but your method may vary.


Wednesday, March 18, 2015

Cannoli Tarts! [The Cookbook...sort of]

[This post is a little belated. I started it a while back after my birthday, but life intervened. Here is it, a month late, but still good! You can make them for San Giuseppe Day tomorrow! Enjoy!]


Another year. Another birthday. Another treat to take in for the coworkers. After last year's casata disaster, I decided to keep things a little more on the simple side this year: I would make cannolis! Little did I know that cannolis were quite possibly the furthest things from simple I could have possibly chosen.

The plan was to whip up a batch of filling according to Bisnonna's recipes and use it fill up store-bought shells. Unfortunately, the weekend of my birthday, as I scoured the grocery stores in my area (ultimately going to 4 different stores), I learned that store bought shells aren't as readily available as I thought they were for some reason. I could have sworn that grocery stores, at least where I grew up, carried boxed cannoli shells, but around these parts, they are definitely less accessible.

So there I was, shell-less with all the filling ingredients and out of treat ideas.For some reason I couldn't get the idea of cannolis out of my mind. Making my own shells was out because my madre has Bisnonna's shell molds. I was stumped. And then I decided to search the internet to see if there was some sort of cannoli shell mold DIY out there (pinterest has DIYs for everything after all) and I found my inspiration: Cannoli Bites! When I saw this recipe, hope rushed back to me. I could adapt Bisnonna's cannoli recipe to suit this new form of shell mold and save the day!


Bisnonna's Cannoli

Bisnonna writes: 1 2/4 c. flour, 1/2 c. crisco, 3T sugar 1 egg, 3oz sherry wine or 6 T
Filling: 2# ricotta, about 1 c powder sugar or more or less, 4 almond chocolate bars cut up, about 12 cherries cut up, 1/2 c. nuts, 1/2 container of Cool Whip. Mix together and put in shells.

Amy's version: I mix up the shell dough with her exact ingredients, except I used 3 oz of red wine and vegetable shortening instead of crisco. The instructions for making the shells are at the Cooking Classy. As for the filling; again, I follow Bisnonna to the letter except instead of Cool Whip, I just used regular whip cream. I find the specific name brand usage in some of Bisnonna's recipe cards very interesting. Surely she didn't always have these brands. Crisco may been around her whole life, but Cool Whip wasn't around until 1966. I'm sure that her recipe was likely adapted from some older recipe after much trial and error; and just like that, the life cycle of the recipe continues.


Tuesday, July 1, 2014

Cream cheese candies [Prozia Margaret]

I was first introduced to these beauties at a cousin's bridal shower. I recall being floored by their delicate appearance and flavor. I also recall being happy to learn of my great aunt Margaret's relatively simply recipe for creating these masterpieces.


Now, I warn you, my recipe may not be 100% exact to her original. This is my attempt to recreate it without calling any relatives. I may have made these very late at night. Additionally, Prozia Margaret's candies were made in beautiful candy molds creating lovely rose shapes, which I did not have on hand. I'm sure you can find similar ones online. These were made very much on a whim and, again, very late at night.


Cream Cheese Candies
via Prozia Margaret

[What you need]
1/4 cup butter
1 8oz block of cream cheese
5 cups powdered sugar
1 1/2 tsp flavoring of your choice (I used peppermint as it was what I had on hand, but I recommend almond or anise for a more authentic touch)
a couple drops food coloring in preferred color.

[What to do]
  1. Melt butter in a saucepan. Add cream cheese and stir until softened and mixed with butter.
  2. Slowly, a cup at a time, mix in powdered sugar until the mixture forms a firm and moldable dough
  3. Add in food coloring and flavor of choice. Or if you wish to do multiple, separate into bowls and do as many different flavor and color combinations as you wish. Mine were "Patriotic Peppermints" for the World Cup as well as upcoming Fourth of July holiday.
  4. Roll into balls. At this point, you can either put them into molds and allow them to set this way or use a fork sugar cookie style if you find yourself sans molds like I did.


Monday, June 23, 2014

Arangini (Rice Balls) [The Cookbook]

I know it's been a while since I've presented a recipe straight from The Cookbook, which was the original purpose for this blog, but I hope to present quite a few of them soon. This week, I challenged myself to a classic bit of Roman street food, and it definitely was a challenge. Not that it was particularly difficult once I figured out how to put it all together, but simply because, unfortunately, many of Bisnonna's recipes are not written as clearly as I would like. Someone are only a list of ingredients. Others...a vague set of steps. It makes following them difficult.

This one falls into the vague set of steps category, but it was actually kind of fun trying to sort it out.

Why can't I ever make anything that looks half as good as it tastes?

Arangini (Rice Balls)
via The Cookbook

Bisnonna Writes: 1# rice, a little salt
cook and cool. Add 1/2 c. of Romano cheese. 4 T. melted oleo. 3 eggs well beaten, a little tomato sauce
Brown 1# hamburg, 1 clove garlic crushed, 1 onion chopped, 1/4 of tomato paste or 4 T. sauce, 1 c. water. cook 20 mins. dip in well beaten egg.
roll in bread crumbs and fry

Amy interprets and makes a few alterations:

[What You Need]
1 cup of cooked rice
1/2 cup of Romano cheese
1 lb hamburger
2 cloves garlic, chopped
1 onion, chopped
tomato paste
1 cup water
Well beaten egg
Italian bread crumbs

[What to do]
  1. Brown hamburger, add garlic and onion to mixture and sauté for a few minutes. Add 1/4 can (about 2 tablespoons) of tomato paste and a cup of water. Cover and simmer about 5 more minutes.
  2. Combine rice and cheese, them add hamburger mixture.
  3. Form balls, dip in well beaten egg and them roll in bread crumbs
  4. At this point you can either fry them for a more authentic street food take or cook them for ~1/2 hour at 350, which is what I did

Thursday, February 6, 2014

Ricotta Pie -or- Salvaging a Cassata fail

[I know, I've been so bad about posting lately. It's no excuse, but it's been a busy month and I haven't gotten much decent cooking done. I'll hopefully be better in the coming year.]

My plan was to use up extra ricotta from the lasagna to make cassata. As you can see, that did not work out for several reasons.


The other layer and filling were already done though! What's a girl to do, stuck with all this filling and only one layer of sponge cake?


The resourceful girl "invents" Ricotta Pie.

Ricotta Pie
by Amy (inspired by Bisnonna's Cassata recipe, which, hopefully, I'll eventually make correctly)

[What you need]
1 sponge cake (I used this recipe pretty much exactly, my madre's trick; however, is to buy one. If I had done that, I might actually have a Cassata to show you, so...tread carefully.)
1 lb ricotta
1 cup powdered sugar
1 cup mini chocolate chips
1/2 cup chopped almonds and/or pistachios
1/2 tsp cinnamon

[What to do]
1. Bake or acquire sponge cake. Carefully (look at my disaster above to see not carefully) place in a pie dish.
2. Mix the rest of the ingredients together, spread carefully over the cake in a pie like fashion and everything will work out in the end.


Monday, January 13, 2014

Beet Greens and Gorgonzola Spaghetti

I would say this dish is part of my Polish-Italian fusion repertoire. Beets, much like cabbage, are an important Eastern European food and goodness are they good for you! For many years, I've been enjoying them on my salads, but as one of my New Year's challenges is to learn how to prepare and use at least 5 new ingredients in my dishes, figured the lovely betaine rich beet would be a great place to start.

There are jars of beets pickling on my canning shelf right now, but that's not the only thing you can do with beets.

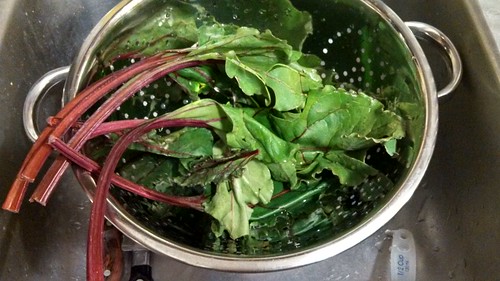
I was intrigued to learn that not only the roots of beets are edible. The tops are too. They're interesting. I was expecting a bitter flavor, like radish tops, but they have a unexpected natural saltiness that really intrigues me.


This recipe is quick and simple; easy enough to whip up on a busy weeknight.

Beet Greens and Gorgonzola Spaghetti

[What you need]
Spaghetti (or pasta of your choice)
Beet Greens chopped from one bunch of beets
Gorgonzola cheese
Tomato sauce
A spoonful of Italian breadcrumbs
Olive Oil

[What to do]
  1. Put on water and start spaghetti
  2. In the meantime, rinse the beet greens and saute them briefly in olive oil
  3. When the spaghetti is ready, stir in the cheese and greens
  4. Top with a small amount of tomato sauce and bread crumbs to serve


Monday, November 18, 2013

Ricotta Cheese

Ask my madre what my feelings are regarding ricotta cheese and she will probably recall my description of said cheese as "a little piece of heaven." It is, honestly, my favorite cheese of all, and with as much as I love cheese, that's a high honor.

Cheesemaking is a project I have wanted to undergo for some time, but I've been far too nervous. It seemed like quite the undertaking and I just wasn't sure of where to begin. With some help from cheesemaking.com though, I was well on my way.

Cheese is in my blood. On my father's side of the family, there's a whole branch of cheesemonger types, but because it's my favorite (and honestly, probably the easiest), I went a little more toward madre's Italian side for my first foray into the world of cheese*.

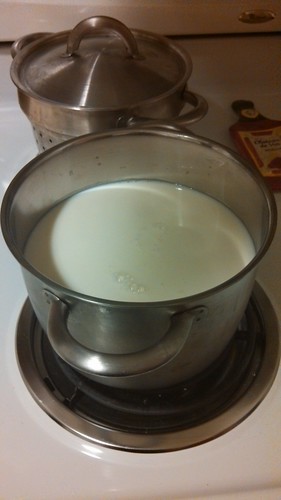
To create a "little piece of heaven" you start with whole milk (making certain it is not ultra pasteurized) in a stainless steel pot. For this recipe, I used a 1/2 gallon.


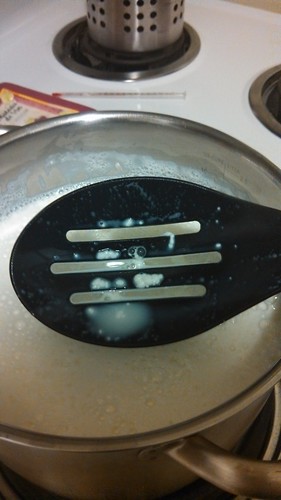
Stirring frequently, add 1/2 tsp of citric acid and 1/2 tsp of Kosher salt. Then heat the milk to 195 degrees F. Soon you will start to see the curds forming, which (at least to me) is very exciting.


After the curds and whey begin to separate and the milk reaches 195 degrees F, let it sit for at least five minutes. While that's happening, you can prepare fore the next step.


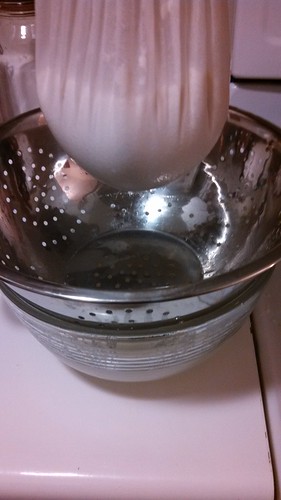
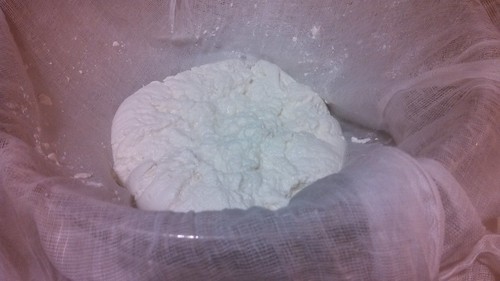
Line a colander with a thin-weave cheesecloth (muslin works well) and ladle the curds into it. Finally let the ricotta drip through for about 30 minutes. I got a little impatient and tried to squeeze mine out. Don't do this. The whey is very hot.


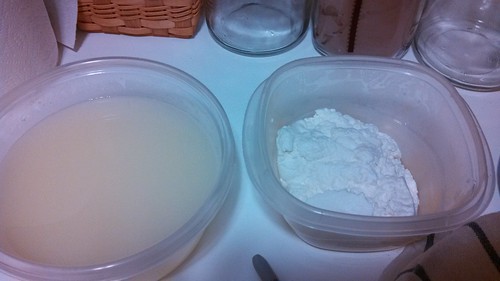
Once separated you will have delicious ricotta cheese and a whole bunch of protein whey, which is not just a by-product; it's totally useful. I made some pizza dough with mine, but the possibilities are endless.


*Well, to be perfectly honest, I was going to start with mozzarella, but I ran into several problems. The largest of which being the only stainless steel pot in my possession was only capable of holding a half gallon, meaning I had to halve the recipe and no one wants to try and cut a rennet tablet into eighths. No one.